Wednesday, August 31, 2011

the evolution of the ice bowl

To conclude our beach theme, we are spending the week talking about all things water.  This unit would not be complete without frozen bowls of water to explore!


I think their favorite part was just feeling the cold temperature of the ice. 

Ro suggested we try melting crayons on top of it, so we did that.

Later, I found the ice dome here (this wooden plank was one of the children's "surfboards", true to form during our beach theme!).  This was over an hour later...this was the ice that wouldn't quit!

It migrated around quite a bit...

Later I found it here in the mud pie kitchen.

And later on a stump, where Te and Sa used it in their dramatic play.


I know for sure at one point Za used it on her food when she had an owie.

What an easy, dynamic prop to introduce in the outdoor environment.

And tomorrow we will un-peel some frozen water balloons and do some science-ing on those!!!

Tuesday, August 30, 2011

Water + Oil + Salt + Freedom = Scientific Discovery!

D is for Discovery in preschool!

Have you seen Deborah's Teach Preschool blog? If not, go check it out! She's celebrating 20,000 followers on Facebook this week so she must be something, eh?

*

We offered the children a "Make your own ocean" station:


Each station included:
1 empty ball jar
1 small container of salt
1 small baby food jar halfway full of oil
2 droppers
2 plastic spoons
1 paint cup with a 2ish tablespoons of liquid water color

Some children asked, "What are we supposed to do?" My response was, "What would you like to do with it?" I love how each child approached their station differently.

Monday, August 29, 2011

Crayon melt

When I saw Pink and Green Mama's post about this activity, I thought it would be a great parting gift for Em, whose last day at Beansprouts was on Friday.

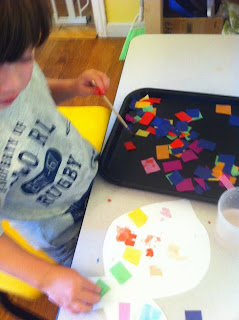
With little coaching, the kids, who were in charge of the embossing tool, created a beautiful melty rainbow.


We'll miss you, Em!


 At the risk of getting mooshy, I did talk to the kids about how sometimes it takes many colors to make a rainbow, and how each child brings a different color to our preschool rainbow.  They smiled at me, but I got the feeling they were laughing at my cheesiness : )  They're used to me and my Stephan-ese by now!

Friday, August 26, 2011

The story behind the scribbles

What do you see when you look at these pictures?


What you see is probably different depending on whether you are a teacher or parent, have an art background or a technology background (for instance), or even what your expectations are of preschool art.

When the 4 1/2 year old artist showed me this series of drawings she created, I was probably more blown away by them than she expected.  I was totally taken by the thoroughness and intentionality that I saw in her scribbles. This child is totally capable of representational drawing and in fact has taken a liking to drawing bad guys in cages!  So what's the story behind the scribbles?  I can only tell you what I see, not having been there when these were created:

  • The use of space tells me that she is very thorough (and some suggest that the more space used on a page, the more self-confidence a child has, although I have no research to back that up)
  • The process was so satisfying that one color sufficed for the entire first three items produced.
  • She used large muscles and fine motor muscles (these were done using crayons, which challenge the fine motor skills more than markers)
  • She did these by quickly moving the crayon across the page, and the force of the crayon on the paper made the paper fold in on itself but that didn't stopt he completion of her work and she still filled up each paper and obviously by the wrinkles it didn't happen very many times.
  • I notice how few times she ran off the paper, even though the crayon was moving fast (I didn't see her doing it but the lines are definitely the quality of those which were drawn quickly).
  • She did four pictures!
I trust the kids ability to choose activities that they need in preschool. I believe children work through social and emotional stuff through art and creative play, and I also believe they challenge themselves with these activities, which I believe this child was doing.

If you are not impressed by this child's art series, please go get a crayon, and as fast as your arm will move, color a full page and make sure that crayon gets right up to the edge of the paper before you change directions.  Oh, and use your left hand, because that's a little closer to what it feels like for the child to use their dominant hand : )

So I've given my hypothesis of the story.  I wonder what her story was?

Thursday, August 25, 2011

Sea Urchins

Three ways to make Sea Urchins:

1.  Use crumbly playdough from a failed playdough recipe (we substituted whole wheat flour for white flour--oops!) and stick colored toothpicks into them for a colorful sea creature.


2.  Use toilet paper rolls cut in half and stick packing peanuts around the sides.  They also made seaweed using this method.

3.  Clay and pipecleaners also make great sea urchins or anenomes.


Wednesday, August 24, 2011

Another Rainbow Fish Activity

Rainbow Fish Scales Collage

Materials needed:
Fish cutouts
Tiny metallic muffin tin liners cut into quarters (got these from the dollar store!)
Adhesive (e.g. glue)


Simple miniature playscape

Beachwood + Rocks from the beach + Tiny pieces of terry cloth + Wooden figures = 

Wonderful open-ended play


Tuesday, August 23, 2011

Bleeding Tissue Paper Fish Scales

We will be featuring many of our beach-themed activities in the coming couple of weeks as we wrap up our August beach theme!

The day we studied rainbow fish (and were disappointed to see how many are not so rainbow colored at all but are indeed quite iridescent!), we made scales our of tissue paper. Brush some water on top, and then peel off the tissue, and oila! A tissue-printed scale!  Easy and fun!


The kids decided to supplement the tissue-print scales with some decorations of their own.


Mud Play

Did you know that mud play is so widely recognized as a beneficial activity for children that there is an international holiday honoring Mud Play???

We set up a new mud play area in the backyard, where kids spent hours last week making mud pies and the like.  It is an area where wonderful social, sensory, gross- and fine-motor, and imaginary experiences take place.  Tristan has agreed to loosen the soil in the area to make even more dirt available for mud play! 


We've since added a small play kitchen and taken down that ridiculous basketball hoop that was duct taped to the trees : )  Also, we've added lots of metal and wooden dishes and utensils purchased at Daiso, the $1.50 store.

Wednesday, August 17, 2011

Glue refill hack

Has this ever happened to you?!?


Then you'll love our Glue Hack!

Use recycled kitchen bottles for a more manageable refill:

This agave container has a wide mouth so the school glue can be easily poured into the container. When we refill small glue squeeze bottles for the kids, it's much easier to get the glue into the opening (which tends to be small) from the agave container than the big gallon of glue. 

 It's also easier to fill small containers with more manageable quantities.

Less waste, more fun!
This activity was glue with various spices mixed into the glue for an aromatic quality to the art activity that day. We used cumin, instant coffee, curry powder, marjoram, cinnamon, and allspice.

Tuesday, August 16, 2011

Ocean Playdough Recipe and Dollar Store Accessories

The standard recipe for playdough is a pretty foolproof way to get a dough that is not too sticky and not too crumbly.  However, to make enough for a class of 12, I have to double the recipe, using 4 Tbsp of cream of tartar instead of 2.  So naturally I was disappointed to find just two tablespoons of cream of tartar left in the container the other day....

I guess I was feeling crazy that morning because I decided to wing it--- I really wanted more than one batch of playdough!

I threw a few things together to double my batch of playdough and it turned out so good, soft, silk, and bright, that I had to share the recipe.


Silky bright playdough

Sift with a whisk:
1 1/2 cups of flour
3/4 cups salt (I used kosher sea salt)
2 tablespoons cream of tartar
1 teaspoon alum

Add:
2 cups of water
plus
1/2 to 1 teaspoon of icing coloring
plus
3 tablespoons of oil

Continue stirring with a whisk, adding water (and coloring if brighter color is needed) until you get the consistency of a thick pancake batter.  Heat a skillet on medium and pour batter into the skillet.  Leave it sit until it cooks through part way and when the sides start peeling up, knead it with a wooden spoon in the skillet, stirring and smashing (like you would in a standard playdough recipe) until an even color is established and the dough seems to be cooked through.

You can test it by pinching off a little and kneading it on the counter.  If it just sticks a tiny bit, it will probably be fine once the dough cools. If it sticks a lot, just cook a few minutes longer, smashing and flipping for even cooking.

After you are done cooking, put a tablespoon or so of oil in your hands and begin to knead it into the dough for a minute or two until it's completely absorbed.

VoilĂ !


Dollar Store Accessories from Daiso:
cocktail umbrellas, $1.50
snack picks, $1.50
hours of fun: priceless!


Wrestling is good for children.

Originally published Sept 2010 Many of our parents seemed shocked when they came to pick up their children from Beansprouts and found the...