Wednesday, February 2, 2011

Our Work Shelves--some ideas

When other providers ask for counseling on how to improve the quality of their program, or when I try to explain to new teachers and students that I mentor just how and why we do the things we do, I find myself challenged with what to say.  Do I explain the philosophical points? Do I jump into examples?  Or would they benefit by curriculum ideas?  How to talk to children? Training the early childhood professional can be daunting.  If you know me you also know that I can be a bit long-winded so it's doubly challenging to share quick tips and ideas.

In this post, I will jump right into some examples of Beansprouts "works" (a "work" is like a Montessori "job"....it has a beginning, middle, and end, but we are not hard and fast about the "correct" use of the work and trust that kids use things in a way that meets their developmental needs). Our works rotate every week or so to keep things fresh and stimulating.  There are lots of other interest areas in the room (dramatic play, blocks and building, puzzles, books, sensory, etc etc), but here is how our "works" shelves are currently stocked.

 Here is our planet matching work.  The kids took an interest in space ships last week so we jumped in and made a theme out of it.  This work was laminated at Lakeshore for, like, a dollar, and each planet fastens to the others with a velcro square.  I used various kitchen items to trace those near-perfect circles.  This would also work with felt.  They love matching the words now that they are into letters, spelling, matching the first letters of their friends' names with the first letters of the planets names.  They will probably lose interest in about a week but I'm okay with that.  We'll be ready for the next thing by then : )

Another laminated work, this time using our at-home laminator.  We hand drew the chart and put little clear collage pieces into the container so that they could practice fine motor, one-to-one correspondence, counting, and patterning with this work.  We, like any preschool classroom, have those children who want to take the collage pieces and use them as food in the dramatic play area, or dog treats to feed their friends (aka pet dogs).  So we put cut up pieces of mardi gras necklaces in the dramatic play area and don't let the kids use these pieces for dramatic play.  That way the work is ready to use and equipped with the necessary pieces.  We can rotate the pieces to keep it interesting, or add larger numbers.

 Here is what one of our shelves looks like.  It's not the most beautifully aesthetic shelf you've ever seen, but its neutral colors and uncluttered nature invite children to grab things off the shelf.  Someone's slippers snuck in there, too.

 This is a wooden bus, people, and blocks that one child can use at a time (or invite a friend or two if they choose).  We bought this on Etsy.

 This work was a Target dollar bin score.  Leslie found the tray at Salvation army and the tongs at Sur la Table (cheap, though, of course) and the black container of game pieces is a scooper from protein powder.  The kids use the tongs to put the x's and o's into the game board.  This has been in the room for over a month and is still a high interest work.  And the entire work costs less than five dollars (and all of the items can be re-purposed for other works).

Here is another less-than-five-dollar work.  This idea came from the amazing Frugal Family Fun blog, which I recommend to anyone looking for simple ideas that can be applied to a variety of preschool ages.  Definitely click this link to find out how to implement this work way more beautifully than we did.  We used a cylinder block for the rolling pin.  When children use rolling pins (and bikes, or crawl, or do finger plays like row, row, row your boat) they have to coordinate both sides of the brain, crossing hemispheres and improving brain development.  Plus this work engages the cognitive faculty to work with and interpret negative space.  (Just click the link, it will all make sense when you see the original post).

 Here I offer you just another way to present a standard peg work.  Looks a lot better than in a plastic bin, although I can tell you that we are not above plastic bins (as you can see by the recycled yogurt container in the background), but we try to bring in natural materials as much as possible.  Looking for cheap baskets?  Go to Goodwill!  My friend took me to Salvation Army the other night and we scored beautiful baskets for less than a dollar!  Not to mention some other awesome stuff for the sandbox!

Even an old (broken) cardboard box can stand in as a work container.  This work is from Lakeshore and is a great patterning work.  Kids learn geometry in a hands-on way and also science (magnets) and fine motor.  Magna-tiles are a must-have in our classroom.  As geometric concepts sink in, the children build ever more elaborate structures.  It's amazing.

 Scratch and sniff valentines cards, courtesy of Leslie.  Why not?  I have fond memories of my own childhood scratch and sniff sticker collection.  I wish I still had it to show the kids.  This brings in another sensory aspect into the classroom, engaging yet another level of the child's experience of the environment.  Other ways to incorporate the sense of smell: scented playdough, smell matching games, herbs in the science corner, essential oils, freshly laundered linens, all-natural cleaning products and hand soaps, and scented sensory table contents like coconut mulch, coffee beans, or moon sand scented with essential oils.

 Magnet wands and juice can lids (with a couple of random things in the bottom there).  Maria has a knack for finding things in our storage and assembling baskets of cool things.  This work incorporates science and sound as it makes really cool sounds when the juice can lids clang together!  How many juice can lids do you think one of those magnet wands can hold?  All of them?  I bet you can figure out a way to get them all on there!

 Aah, the amazing Leslie made this work, too.  We are big on matching works, as you might already know.  But they are easy, so bringing in new ones is a breeze.  Plus there are many levels of complexity.  We got the felt from the fabric store and glitter paint from Lakeshore.  Another example of a Valentine's Day themed work can be found here.


 Be's mom made us a Goldilocks and the Three Bears felt board story (and a Three Little Pigs one, too!).  We put it in a ziplock with a large piece of felt on a try and let the children narrate it.  It's great for language development, cognitive skill development (repeating a story from memory, in sequence), fine motor, and social development as they act it out with friends.  Not to mention, they get the "work cycle" down, whereby they take something off the shelf, use it, and put it away.  This work has a built in clean up process to it.

 Another matching work!  This is laminated from an printable owl calendar that we printed twice, laminated, and made matching works out of.  The colors are all subtle and muted so it's very tricky to match the right owl pictures (this is a good thing...gives them that just-right challenge).  Ak created her own just right challenge by putting them face down and making it into a memory game!


 These are magnetic letters that when used on the tray (which is metal), stick, but can also be used on the tabletop.  We threw some extra letters in there to throw them off, hehe.  Again, we know their abilities and are trying to challenge them appropriately.  Success doesn't feel good when it comes too easily, nor if it's too frustrating to accomplish the task.

Another matching work.  The fruit was hand drawn with Sharpies and the kids use the tongs to place the fruit in the appropriate compartment.

Here's a visual of one of our work shelves.

There are a ton of ideas out there on how to create developmentally appropriate works that interest children.  Our sanity as teachers depends on keeping the environment fresh, stimulating, engaging, and attractive, so we are constantly racking our brains (and scouring the internet) to find new works for the classroom.  If you have any cool ideas or links, please leave it in the comments and share with all of us!

I applaud you for making it through this entire post : )

*Stephanie*

Wordless Wednesday


Monday, January 24, 2011

A Right Way and a Wrong Way

I usually start my art projects by sitting at the table prepping the work.  Sitting down and engaging with materials is one of my tricky ways of getting kids interested.  It often works like a charm.  By the time the project is ready I've got a small group of kids nearby who have been patiently waiting to get their hands on it.


When this trick doesn't work, or if I happen to get the art project set up before any of the kids arrive, I create an interest by sitting down and doing the art project.  I know a lot of teachers who just gasped.  Yes, I said I sit down and create an example art project.  Because opinions of this practice differ, even here within Beansprouts, I then display my art project or put it on the drying shelf.  I don't ever say to the kids, "See, this how you do it."  I simply make an example and put it a place they can see it, if they need to get ideas.


Typically they do their own thing anyway and I sit near by in case an emergency intervention is needed.  I only intervene for safety or sanity.   When someone can get hurt or the teacher will have a melt down trying to clean up the aftermath (most of our projects turn into hand painting experiments for our youngers).

My example project is the small square in the middle.
This particular art project involved cardboard, glue, shredded paper and water colors.  I knew going in that an art project that mixes mediums could be a challenge, but I was excited to see what the kids came up with.


Many of the kids jumped right into mixing colors.  This is a fun art project and one we do sometimes, but cardboard and water colors don't work well for that.  I started jumping in a little and explaining to the kids that their colors wont stay unless they use glue and paper.  


When one of the children lifted up her art project to show me her "fish bowl" the colors ran everywhere and her creation was no more.  The expression on her face broke my heart and brought up a big question for me.  

When I plan an art project that is new to the kids, should I introduce it?  Should I explain to them how the mediums work and what could happen if they choose to use only some of the materials?

Sure the kids are learning through trial and error, but I could have saved that child from the heartbreak of a ruined masterpiece if I had just explained the project a little better.  

Q:  What's worse letting her experience the disappointment or risking limiting her creativity by introducing the art project?


A: Find a happy medium.  Introduce the work, explain how the materials work and then let the kids experiment.  This way, when a child's work gets ruined, a connection will be made.  Maybe the light bulb will turn on and the child will think, "Oh!  That's what she meant when she said I'll need glue and paper for the colors to stay put."  Then she can modify or try again.  
There's no right or wrong way for the kids to do art.  There IS a right way for teachers to introduce and facilitate an art project.  I must remember it's all about the process.

 Let me know what you think.  I'm sure there are many different answers out there.


--Leslie


Saturday, January 22, 2011

Sticks and Stones

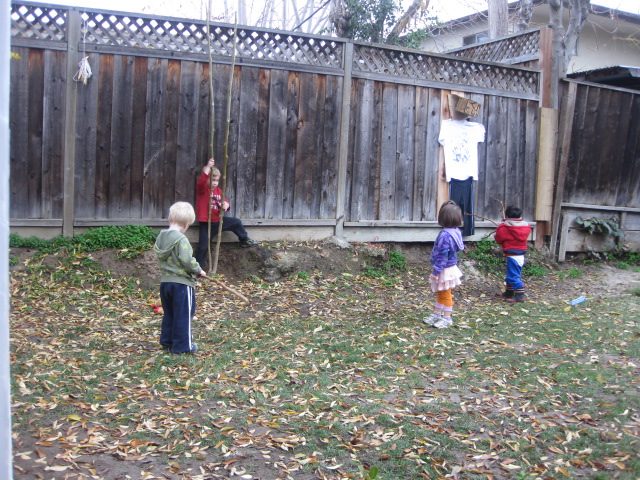
For children, there is something very empowering about carrying something twice the length of his body, collecting two dozen twigs to make a bouquet, or using sticks as props in play to bring a sense of completion.  Carrying around stepping stones challenges the strength, just as carrying long or bulky pieces of tree challenges the coordination and spatial awareness.

I can imagine our Neolithic ancestors hunting and gathering, using the same skills that the children are practicing in their play with sticks and stones.  For the stone age people, hauling heavy carcasses and tree trunks and gathering seeds and vegetation for food was part of their survival.  Could our ancestry be rooted in the type of play that I see in the yard, creating with it an inherent sense of gratification?


I used to have a hard and fast rule about sticks, which I viewed as dangerous in their ability to impale or poke out eyes or be used as a whip.  “You can use sticks if you are sitting down,” I would declare, never realizing that what I was actually saying was, “I don’t trust that you can walk around with that safely.”  I mean, it’s not like I’m handing over a chainsaw (although one day a child found the perfect branch with an appendage that made a perfectly shaped handle—he couldn’t have been happier--it really did look like a real chainsaw!). 

One day after discussing the sitting down rule with the other teachers, we decided to change it.  For one thing, it was really hard to constantly remind the kids to sit down while using sticks.  It wasn’t fun that way.  So we decided that as long as the children’s feet were on the ground (e.g. not on a climber or slide or bike) then they could use sticks.

At first, I watched very carefully how children handled these long dangerous spears.  For the most part, they understood the inherent danger in the sticks and seemed to use them carefully.  But what was impressive was the length of time spent using the sticks.  They would literally have their sticks for the entire outside time, only taking breaks to eat.


With supervision, sticks and stones can offer tools for open-ended play and also challenge children on a physical level.  The birthday cake in the sandbox isn’t complete until there is a twig candle in it.  The workers in the yard cannot carry out there business without their saws and hammers and large planks.  The child trying to explore her own strength wants to carry heavy and dangerous objects to feel a real sense of power.  Sticks create an extension of the body that allow for spatial awareness and also bring a sense of being bigger.

We have these two saplings that grew from a mother tree.  The kids used the branches, leaves and all, like long palm fronds, and asked the teachers to pull them off until there were none left.  Now that the trees have no branches left, I feel kind of bad.  But they make for a great large motor area.  Kids go to these twin tree trunks often to show off their "cool tricks" and "exercise".


 Beyond the children using sticks is Ta using the tree trunks to get some exercise.

 Rocks make the perfect open-ended prop and bring with them an aesthetic property only found in nature.


*Stephanie*

Thursday, January 20, 2011

Shaving cream table paint...making way for new ideas

   Bl felt how I felt as a new teacher, watching the kids take the art project in a whole different direction than planned.  It took him just a couple of minutes to open up to the new direction that this art project was headed.  I wish I could say that I evolved that quickly as a teacher.
The longer I teach, the more I value what the children bring to the table.  Today, I had a plan, and luckily I knew that a group of twelve strong-minded kids laugh in the face of a plan.  So part of the plan was letting go of the plan.  You are a very frustrated teacher if you haven't learned this skill.

My initial inspiration was this marbled print post that, while geared toward much older children, had components that I wanted to try with the kids.  We would do a collective shaving cream mess, and then make a print of it.

Needless to say, the kids had a way better idea of how to make this project completely fun.  My favorite part, besides the sunny day which allowed for a washing station in the water table, was watching how the kids interacted with each other in a completely cooperative and respectful and silly manner.  I didn't have to intervene at all, even when resources became limited (the usual cause for arguments).  I have been really blown away by the level of cooperation and communication between the kids. (For those of you outside of our direct community, they are ages 3ish to 4ish).

There were too many photos to upload to Blogger so please join me in a journey through Picasa, where the rest of this post is narrated through the photo captions...

Click here


This activity is my best so far...this week : )

*Stephanie*

Wednesday, January 19, 2011

Graham Crackers for Snack

Today the kids made their own graham crackers for snack!  It was fun for them to roll out the dough, poke the dough with a fork to make holes (so the crackers would stay flat and not puff up), and then use the pastry roller to cut out cracker shapes.  Pizza cutters might have worked better because the guard on the pastry roller kept getting caught in the dough.  Some kids cut their graham crackers into four, some into ten tiny little crackers, but all enjoyed the process.  Cookie cutters work, too! And they store surprisingly well.

If you are a teacher or parent looking for a fun (and forgiving) cooking project to do with your kids, this one is for you : )  Me and the first couple of kids to arrive made the dough, and everyone else did the rolling, poking, and cutting.

p.s. Leslie made Banana-Cashew Balls in the afternoon.  This no-bake, cookie-dough-esque treat was a big hit with the kids (and, ahem, me).

Cinnamon-y Graham Crackers
Adapted from this recipe
Yields equivalent to about 12-14 of the store-bought graham crackers

Dry:
1 1/2 cups whole wheat flour
1/4 cup sugar or 1/3 cup sucanat or dehydrated cane juice
1/2 teaspon baking soda
scant 1 teaspoon cinnamon
1/4 teaspoon salt

Wet:
1/4 cup oil
2 tablespoons molasses, rice syrup, honey, or maple syrup (molasses works best)
1 teaspoon vanilla extract
1/4 cup water or non-dairy milk (we used almond milk)

Preheat oven to 350 and line a baking sheet with parchment (or spray with nonstick spray).

Mix dry ingredients with a whisk.  Make a well in the center and add wet ingredients, giving it a quick whisk and then stirring it into the dry mixture with a wooden spoon.  Knead with your hands as needed to create a dough that holds.  Add a bit of water or milk if the dough is too dry (not too much!).

On a floured surface or between two sheets of wax paper, roll the dough out to about 1/8 inch thick.  Cut the crackers into the shapes you want (this can be perfect rectangles or, as the photos below suggest, very imprecise...it doesn't matter much.  Pierce the dough with a fork a few times so the crackers don't puff up when baked.

Trasnfer the crackers to the prepared baking sheet and bake for 11-12 minutes.  They should be darkish around the edges.  When it's time to take them out of the oven, you will smell the done-ness when you open the oven door.  They will harden as they cool.


Wrestling is good for children.

Originally published Sept 2010 Many of our parents seemed shocked when they came to pick up their children from Beansprouts and found the...